Saturday, February 18, 2012

My Creative Space

I just discovered that this is my first blog post since Christmas Eve, wow I didn't think it was that long, but I am really trying to think of interesting things that I can tell you about more often, so I'm trying to get back here I promise.

Anyway I thought I would start by showing you a few little areas in my Sewing Room. Have you seen the Quilting Gallerys website? Pat Sloan has started a Learning Centre over there and is doing a feature on Organising your creative space.

This inspired me so I got busy last month and started organising. I wanted one of those peg boards you can get at the hardware, but I saw this shelving system at Aldi and thought that it would do nicely, oh and I wouldn't have to rely on hubby the build a frame ;)
Its fantastic, I have a place for my scissors, Stencils, Headphones (great for blocking out screaming kids hehehe, and of course all the little bits and pieces like basting pins, screw drivers, Marking pens and everything else that I have collected.
Heres just a few of my scissors and rotary cutters that fit perfectly in the screw driver rack.
Over the other side of the room is these super cute tins that I got for half price.. Score!

The purple tin on my storage rack is perfect for my Pearle 8 quilting threads.
And the tidy section of my Fat Quarter collection ;)
People laugh at me when I say I have a massive basket for my scraps, but here it is, all of these pieces are a lot smaller than a fat quarter, tehehe I have trouble throwing fabric away. Can you tell?
This is my design wall. The Cathedral window blocks are a cheats technique I've been working on for years and then I discover that someone else has just published a book using the same technique (google the 10 minute block to see what I mean), ohh well I guess no idea is a new idea :) I'm still going to teach some workshops using this technique.
The other projects are a portrait of my eldest daughter that I started about 3 or 4 years ago, a christmas stocking that I embroidered on some ticking and a little garden embroidery.

My design wall is a product from Floriani, it is tacki on both sides of a batting type material and is supposed to stick to the wall and then your projects are supposed to just stick to it. I had to actually staple it to my wall because it just wouldn't stay up, but my projects seem to stay up ok, as long as they have a wadding on the back of them.
Oops heres a pic I meant to put up the top of this post, but it is basically all my Sewline pens, fabric pens and basically all my pens for using on fabric in one side, then all my normal pens, pencils, erasers and sharpeners in the other.
I thought I throw this in to show that my sewing room is still a work in progress with big piles of stuff everywhere hehehe. Oh well its a start at least :) See the Blue vase, In made that years ago when I was in my Pottery phase :) Actually those vases I painted on it would work on a block I think. Oh dear there I go again wanting to start a new project when I already have 20 on the go.

I haven't shown my table yet as there was secret stuff on there when I took these pics, but I will show you soon I promise.

Whats you best organisation tip?

Hope you have a great weekend!

Hugs Paula

Saturday, December 24, 2011

From my family to yours, I wish you a very Merry Christmas and heres to a wonderful New Year!

Cheers and big hugs Paula

Tuesday, December 20, 2011

The year that was 2011

Wow What a Year!

Thats got to be the understatement of the century!

I have gone from being on a disability pension and in a wheelchair (I thought for the rest of my life) to starting my own business, having one last surgery and getting out of my chair, and then working a few days a week at an awesome fabric shop!

It not all been good though, I have had too many deaths in the family and many ups and downs in my marriage, but all in all, I think that this year has been one of my best ever!

I have 4 amazing children who make me smile everyday and a job/hobby that has gotten me through some tough times! I hope your year has been a good one and that the next is a winner for all of us!

Anyway, onto the show and tell. I have had a fantastic few days in my sewing room, I have made sooo many gorgeous gifts for my babys and just couldn't help but try a few on my baby girl.
 I fell in love with the Bubikini from Little Bird Designs and so I am making them for all 3 of my girls and my neice as well, sooo cute! Unfortunately I had run out of the polka dot fabric, so the ruffle on the top was a bit too thin, but still cute.
 Sorry about the flash, but this is one of my favourite pics of the year. My Hubby and Bubby watching telly last night, the only way it would be more realistic would be if Daddy has his bottle next to him too ;)
 Heres my baby boy, his favourite thing is to put a sock on his hand and put on a funny voice, the cheapest puppet you've ever seen tehe. It's funny how the Sit Me Up Donut has taken a major roll in our house this year. All the kids love it and somehow the insert just never stays in it, they love sitting in the middle or reading in it, or Emmas favourite new thing is doing Belly Flops onto it :)
 But a great way to finish the year is with, I think my best work yet! This one has been months in the making from tiny little sketches to a full single bed sized sensory quilt.
Tummy Time is my newest pattern and is heading to shops as I type (thanks to Pattern Press of course). Tummy Time recieved a huge reaction at the Australian Quilt Market and I'm just so proud of it.
 As most parents will know, we are encouraged to lay our babys on their Tummys for a little while each day so they can strengthen their necks. To make this more interesting for little ones, the 'Tummy Time' quilt has lots of different textures for them to play with.

Buttercup the Kitten has a faux fur chest and tail, Madeliene the Sheep is made from chenille. Mr Toucan has a flappy 3D wool felt tail. Ralphie the Elephant has suede feet and ears, as well as a flappy ear, Ted the turtle has metalic spots while Denis the Duck has a minky wing and a squeaky toy and finally Pickles the Puppy has a 3D tongue that is also crinkly.
I hope you like my newest pattern! Wow who would have thought on the 1st of Feb this year that by the end of the year I would have released 9 patterns!
The kids are screaming so I best go, but I hope that you have an amazing holiday season and whatever you do I hope you are safe and happy!

Hugs Paula xxx

Tuesday, December 6, 2011

AQM and a trip to Tocumwal

I have had a crazy few months! As well as working on a new pattern (pictures soon) I took a quick trip to Tocumwal to visit my dear old Dad. Dad has Leukemia and has had a tough few months with Chemo so we thought a visit with his girls would be the best medicine.

Heres Poppa with his best girl, my Molly.
 We had a great time in Toc, we went Koala spotting and got so close to them it was fantastic! Chloe also had a ball in Nannas garden, she loves picking flowers and putting them in her hair.

 Another reason for the trip was to head down to the Australian Quilt Market in Melbourne.
I had a fantastic time even though I had no kids with me for the first time in 7 years, I missed them terribly! The Pattern Press Stand that Helen and Melissa set up was so fantastic! I had so much fun talking to everyone, new and old friends, a fantastic weekend!

Heres my section of the stand, almost all my samples made the trip and they looked fantastic I think.
 One of the highlights of the weekend was heading out for dinner on the Saturday night with some of my favourite designers. The cameras all got pulled out when it was desert time. Natalie Ross was there, a big fan of chocolate as you can see ;)
 Helen was a good girl and settled for a wafer from her daughters desert :)
 Melissa Grant and Gail Pan shared their chocolatey Orange yummyness.
And me, well I just had a Hot chocolate, so no pictures of that :)

After having trouble getting my car started tehe I finally got back to Tocumwal on Sunday night and remembered oops the girls had been invited to a birthday party for their new friend Alice. So I whipped up a cute little party dress for here from some of my favourite new fabric that I had scored at the AQM. The lovely designer is Tammie from 'Buddies Coirner'
The dress I sort of made up as I went along, but I got the bodice pattern from here.
 The Fabric has such a high thread count that I raw edge appliqued the flower without even using any fusible webbing... I'm in love with Tammies fabric, can you tell :)

Finally I decided, no more work and we had a great time, we went sight seeing and visited some more new friends on their property, they had this massive tree on their property, which takes about 12 people stretched with their arms out to reach around it!! My Dad is over 6 foot tall, so can you imagine how big this tree is!!
What a fantastic week we had! Hope you have a great one too!

Hugs Paula xxx

Monday, December 5, 2011

Winners

Oh dear, I have been feeling soooo guilty, It has been forever since I mentioned my new pattern giveaways and I haven't had 2 seconds to get organised to announce the winners.

I have finally drawn the winners though and congratulations go to:

rosewendy said...
I am a follower. I love the Kids sewing book. It looks bright and fun- a great way to interest young people.
wendyhatton(at)yahoo.com.au

Quiltin' Sandy said...

Hi Paula I am a follower. Your patterns are really lovely. :0

So Ladies send me an email and let me know which of my patterns you would like (You can choose from any of my patterns not just the new ones) and I will post them out ASAP.

I will hopefully find 5 minutes to get back here to fill you in on the excitement of the Australian Quilt Market in Melbourne last weekend. OMG it was awesome!

Wednesday, November 2, 2011

2 new Patterns and a giveaway!

I'm really excited to announce that after quite a break from pattern writing, I am finally 'back in the saddle' and have finished another 2 patterns that will be available from next week!

One of the things I have enjoyed most since I started working at My Patch in Milton is teaching! It has been so much fun for me to pass on the little hints and tips that I have picked up along the way and to be able to encourage people who what to, but have never sewn before.

With that in mind I have created my 'Beginners Quilt' This quilt is a great place to start for people who want to try 'Patchwork and Quilting'. I have really tried my best to make this pattern extremely detailed and have included diagrams to make patchwork 'achieveable' for everyone!
 This pattern will guide you through a Bordered 4 Patch and a 9 patch. It will teach you how to strip piece, how to nest seams and lots of other tips and techniques along the way.
 I have also made this quilt in a Jelly Roll and it is lots of fun to make! I hope you like it!

I have also been teaching kids in our School Holiday Workshops. I've been working with kids from 7 to 13ish in the workshops. They have inspired me so much with the desire to learn and so I have put together my first ever little Booklet.

Ready, Set, Sew: A Kids guide to Sewing has 5 Fun Projects for kids! This booklet is designed to grow your childrens skills and their Love of sewing!
 We start with a Needlebook to store your favourite Needles, we then move on to a Pin Cushion Bracelet. The pin cushion is also removeable too so your little one can wear their bracelet anytime! Another project in the booklet is an Owl Canvas, a great decoration for thier bedroom, theres also a personalised cushion and finally a gorgeous little Dolly Quilt.
I hope you love my new designs as much as I do! I think they would make fantastic christmas presents for anyone who is interested in learning to sew!

The easiest way to get one of my patterns is to ask your local patchwork shop to order them in from Pattern Press.

OK so here is your chance to win one of my new patterns! All you need to do is follow my blog if you don't already and make a comment on this blog post. Don't forget to leave me a way of contacting you if you leave a no-reply comment. Don't forget to tell your friends!
I will draw a winner on Friday the 11th at 9am Sydney time. Good Luck!

Happy Stitching!
Hugs Paula

Thursday, October 6, 2011

Finally something to blog about :)

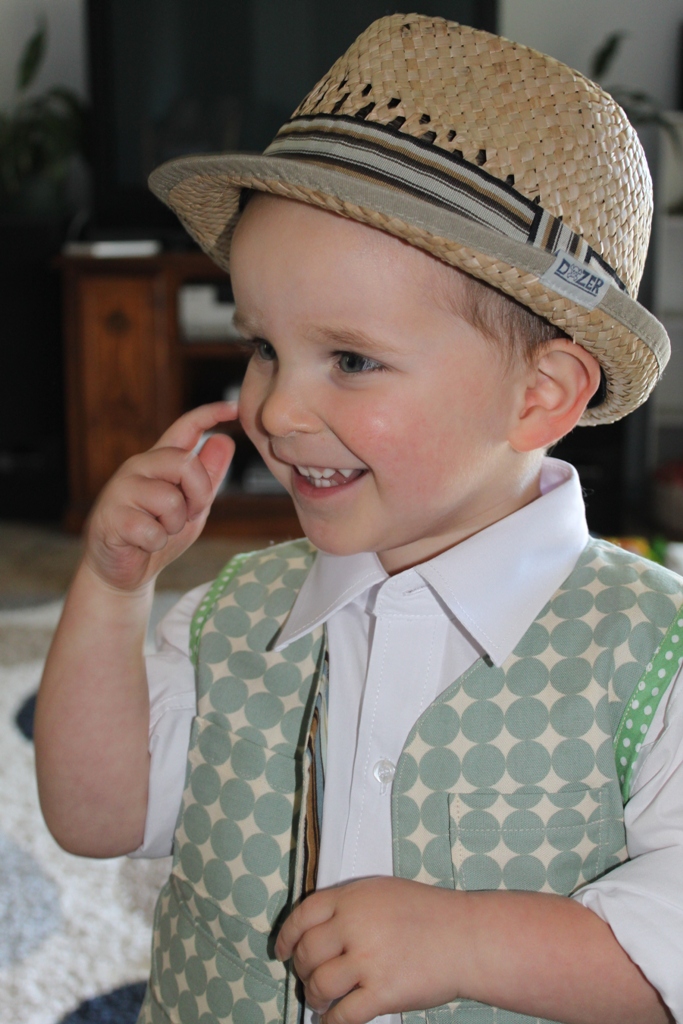
My little man celebrated his 3rd birthday at the start of the month and since the very first time I had seen the Oliver + S Book, 'Little things to Sew' I had wanted to make him the gorgeous Explorer Vest. I finally got around to it and I'm just sooo happy with the result!
 Jack is a huge fan of pockets as most little guys are, so this one was a perfect project for him.
I found the pattern really easy to make and the result is just too cute! 
The hat looks down right gorgeous too :)
Happy 3rd Birthday little man, I adore you xxxxxx

Hugs Paula

Sunday, September 11, 2011

2 little birds

My Dear Daughter number 2 was invited to a birthday party this weekend and I decided it would be nice to make her friend a pressie instead of buying just another piece of plastic, so I got busy and made her one of the gorgeous Melly and Me patterns, Hooty and Tweet.

What I didn't know was that she was an Owl fanatic and her bedroom is totally decorated with little tweeters :)
 I decided to make a few extras for the shop, so Hooty and Tweet will be heading to their new home next week.
 I cut up some kits as I was cutting, so if your interested give us a call at the shop next week. My Patch Fabrics 02 4472 2471 or have a look at our Ebay Shop.
Hugs Paula

Friday, September 9, 2011

Cake Pops!

I have had sooo much fun today!

I little while ago I stumbled upon the Bakerella Website and just fell in love with the gorgeous Cake Pops, after all what is better than gorgeous little cakes? Little cakes on a stick of course!

So I ordered the book and waited patiently for it to arrive. Then I got the book and realised I couldn't buy the candy melts where I live, so I ordered 'lots' from an online cake decorating shop and I was finally ready to get going. But of course I'd forgotten to order some lollipop sticks. hahaha
The cake pop gods were against me, so back online and finally this morning the sticks arrived and I was champing at the bit to get going.

So I head into town to buy all the little bits to decorate my cake pops, I was going to make little pigs, so I bought every miniture lolly I could find!

I crumbled up my cake and added the icing, then rolled them into balls, but of course I was too impatient to let them chill for long enough and my first attempt was less than perfect ;)

 hahaha, not quite the perfectly smooth cute little balls I'd seen on Bakerellas website or in her book, so I put my cake balls in the freezer and sat down to have a proper read of the book (rather than just looking at the adorable pictures).

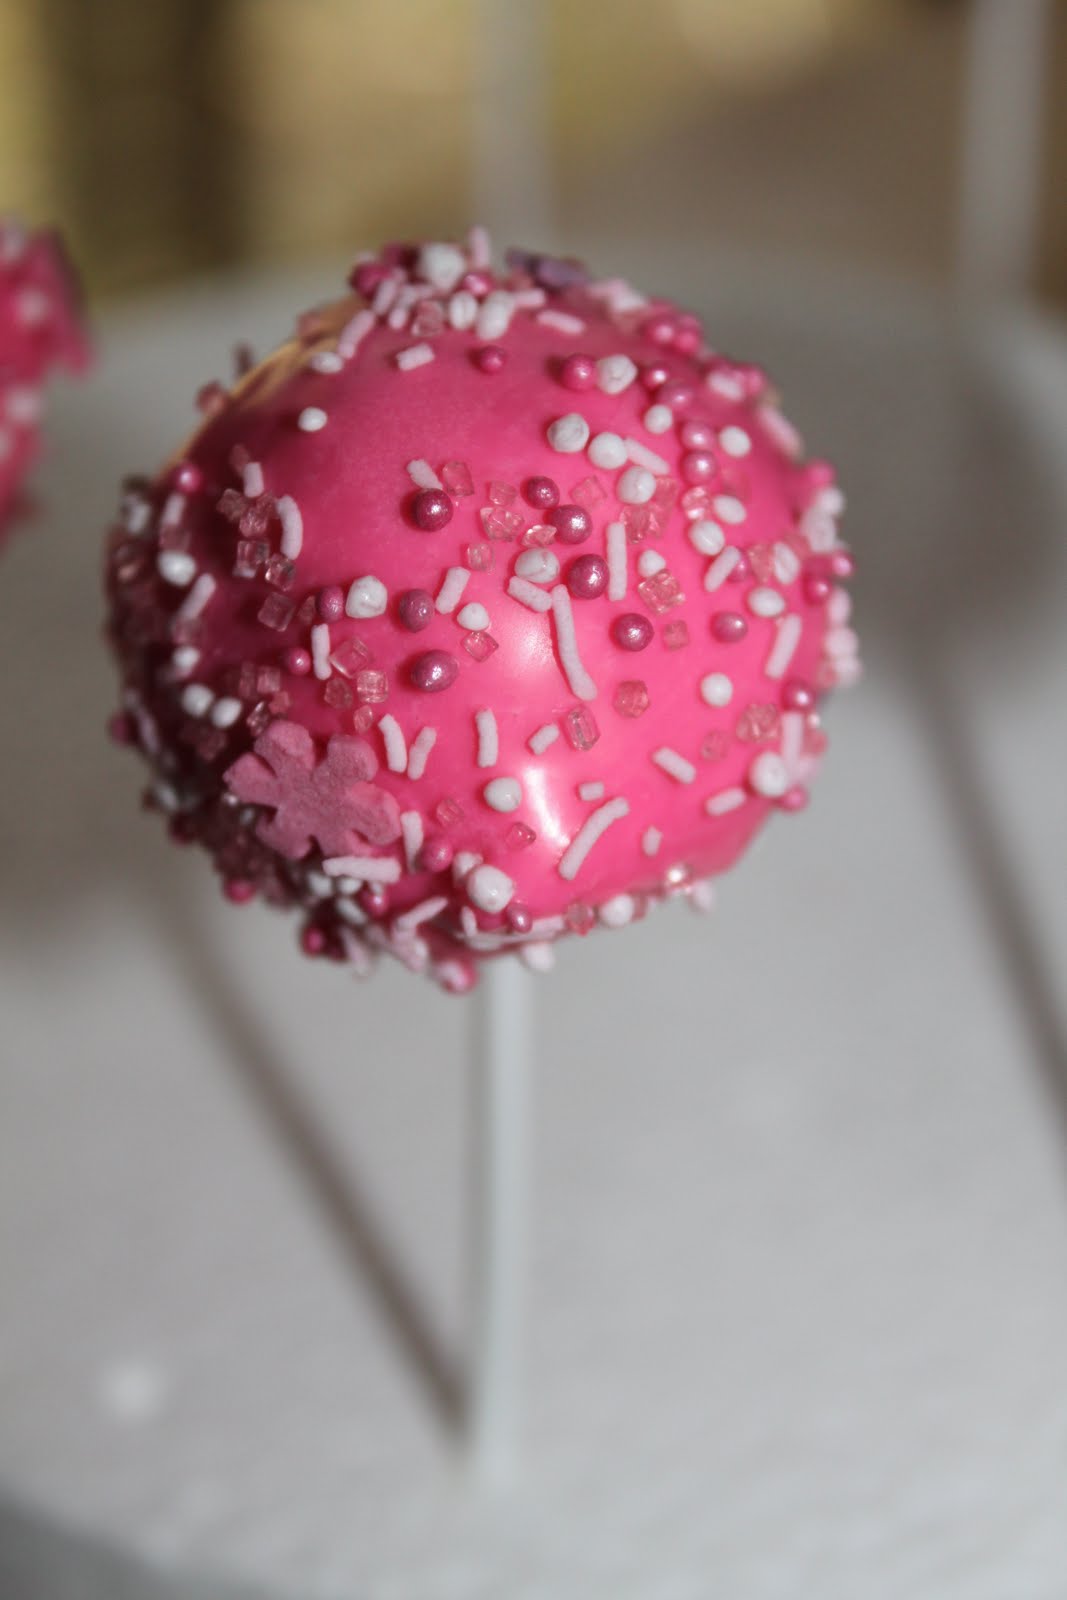
I decided to forget about making little pigs and just try and make nice smooth cake pops with sprinkles and this is what I came up with :)
 I realised that my candy melts were too thick and I freacked out a little when I thought I might have to go back to the shop for some copha, but thankfully the magic lady Ms Bakerella said you can subsitute some vegetable oil, I knew I had some of that in my pantry, so a few teaspoons in the mix and I was off and running. Or really off and dipping :)
 Ohhh they are so much fun to make, but the kids just got home from school, so I'm sure my little pops wont last for long. :)
Hugs Paula

Tuesday, August 23, 2011

Big Sale!

Today I bring great news!

Val is the owner of the shop I work at a few days a week and she has been on a buying frenzy since we opened, so much so that she has forgotten how much she ordered and now the shop is totally overflowing! Seriously she had to take some fabric home because ther was absolutely no room left for the stock.

Anyway this is great news for you because we are now having a storewide 20% off sale! That means you'll get 20% off even the new fabrics, we just got in some of the most gorgeous Riley Blake and Robert Kauffman fabrics! There's the Laminate fabrics, Anna Maria Horner, Amy Butler, just about everything thats new and fresh! There's also heaps of flannel that has an even bigger discount, so give Val a call today on 02 4455 4087.

I've also gotten into the spirit with my Beautiful Big Bras Ebay shop and I'm making everything Freight Free!! So head over to my ebay shop and grab a bargain this week! So click here to shop now.

Have a great week,
Hugs Paula

Wednesday, July 27, 2011

Blackboard fabric mini Tutorial

I think it must go back to my childhood, but I just love Blackboards! I always have I don't know why, so when I discovered blackboard fabric some time back, let me tell you I was a happy girl :)

I've had a little bit for some time and I've been wanting to do a canvas blackboard for ages so when some of the new Riley blake fabrics came in to work last week I just couldn't help myself!

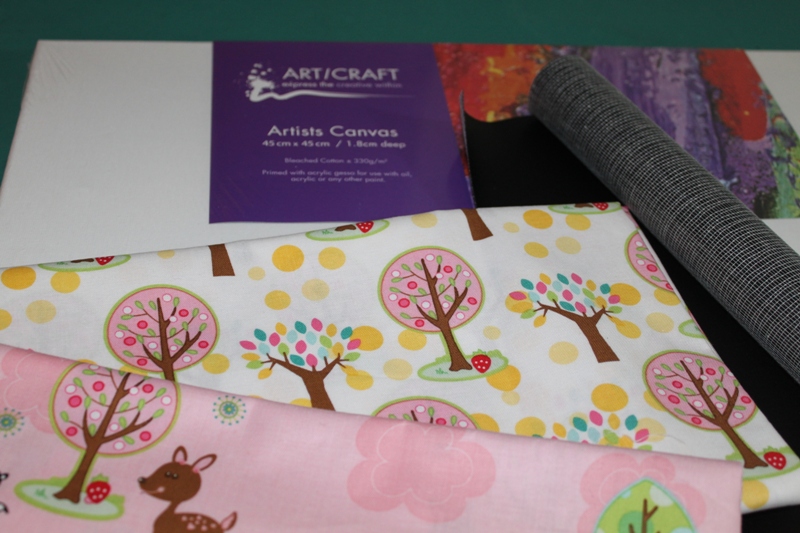
I used a 45cm square canvas that i got at the cheap shop and a Metric fat quarter of the tree fabric for the background. I also used some leftover batting which was about a FQ size, a second co-ordinating novelty fabric, some brown fabric for the trunk and about a 6" strip of blackboard fabric. If you can buy a fat Quarter, that would be plenty! I also used a small amount of fusible webbing (Vliesofix)
 I first just drew a really simple tree trunk shape on the paper side of the fusible webbing. I used the pattern on my fabric as inspiration, don't get stressed about it, just a big simple shape is fine! Iron the webbing onto the brown fabric and cut the shape out on the drawn line.

I layed the background FQ on top of the canvas and centred it (I just eyeballed it) I put the tree stump a bit up from the bottom of the canvas frame. I carefully lifted the FQ and took it to my iron, trying not to move it and ironed it in place. I'm not overly fussed about it being perfect, but you could take more care if you like.

I then took it to my machine and machine blanket stitched it in place. If you don't have a blanket stitch on your machine a satin stitch or even just a zig zag is fine. You could also just hand stitch it if you want.
 Now onto the precious blackboard fabric! Yeah!! I got a marker, I actually used a purple gel pen because it showed up easily on the back of the fabric and it was already on my sewing table ;) I traced around 3 circle shaped objects that were in the room. They were a small plate, a DVD Disk holder and a cup. You could do any shape you like.I cut the circles out and took them to my project.

Tips on Blackboard fabric: I really don't know what its made of to be honest, but it looks like a vinyl and  it really does not like the iron or pins!! So if your fabric is a bit curly try not to worry, you are stitching it down and it won't matter. If its really wrinkly, turn your iron down low and just swipe over it really quickly. If you iron it for too long it will go shiny and won't behave properly later. Let it cool and if you really need to, do it again. You must let it cool between each swipe or it will melt and be a big mess on your ironing board.

If you use pins on it, you will have a permanent hole in the fabric,  and ironing is out so using any fusible fabric is pretty much out, so I just used a liquid glue. I tried a glue stick, but mine was a bit dried out and didn't work well. I had the runny glue, so I used it instead. I just put a dab around the circles and stuck them into place. You really don't need much, its just to hold it in place while you stitch it.
 I took this to the machine and did a blanket stitch all around. Remember to take it really slow because you only get one chance at this! Each stitch puts a whole in the fabric, this is why I like to use a really simple shape like a circle, I have also done stars and squares would work too. I haven't tried stitching through it by hand, basically because I think it would be a challenge to get the needle through. If you want to though, go for it :)

I also ironed some fusible webbing onto the back of some cute little novelty fabrics and fussy cut them out. I ironed them onto my background and pinned my top to the batting and just raw edge appliqued them in place. I think next time I would use a fabric that is more contrasting, because they got lost a bit on my background.

Priming the blackboard fabric: I have read that you need to 'prime' the fabric before you use it or the first thing you write on it will be there forever. Basically you need to turn your chalk sideways and rub the chalk all over the blackboard fabric so its totally covered in chalk. You then rub it out and your ready to go. I generally use a damp cloth to remove all the chalk and it works for me, but you can test this on your scraps if you like.

You can do a bit of free motion quilting if you like then just staple the finished project onto your canvas and your done.
If you are interested in a kit for this project, email me and I will let you know how much it would be for the fabrics. The canvas would be a bit hard to post :)

Have fun and remember to email any pics if you give this a try.

Hugs Paula

Sunday, July 24, 2011

Stitching Therapy!

I really have been trying to get back here and update my blog, but life just seems to be so busy all the time.
My patterns have just gone crazy (thank you so much to everyone who has bought a pattern) and my work at the shop My Patch is so much fun, but even though I only work 2 days a week, I am finding it so hard to stop and take a breather. I'm sure you know what I mean :)

So it was a bit of a forced break for me this past week when I was back in hospital yet again for some more surgery on my knee (this was surgery number 4). Anyway, things went well and hopefully it looks like this is that last one! YEAH!! I'm a bit slowed down being on crutches so I've found some time to do a bit of stitching for therapy :)

When I was at the Sydney Trade Show a month or so back, I spotted this beautiful Block of the Month project, designed by my awesome publisher Helen Stubbings of Hugs and Kisses and Colourque fame. So when I knew I was going to be in hospital for a few days I prepared a heap of blocks to take with me and I actually got a lot of it done!
The project is a Wallhanging designed to be like the samplers of old that our Mums and Mums Mums used to make when they were kids. I thought It would make a really nice heirloom project to leave for my children, to commemorate my love of fabric/stitching/Quilting. :)
 It includes all the important dates in my life, like my birthday and marriage date.
 Some Needleturn which I'm soooo happy with!
And some lovely poetry. There's also lots of 1/2" hexagons which I'm really enjoying doing!

So there we go, I have finally shown you what I've been up to.

Oh I nearly forgot, in my spare time ;) I've started selling some Plus Size Bras on ebay :) I got a bit tired of frumpy and plain and boring bras, so I went searching and found some really gorgeous bras and started importing them.
I think I'm on a winner because they are selling like hotcakes and I just put in another order, so there will be more to list in about a week. So if your interested head over to my ebay shop, Beautiful Big Bras theres nothing under a 16C.

Hugs Paula xxx