Monday, June 29, 2009

Needle turn Applique

Can you believe that 1 week ago I couldn't needleturn to save myself! Seriously!

The butterfly on the right is my first attempt at the thimblelady's technique, The one on the left is my second and the top one is my newest attempt. Sorry about the pics, my camera is crappy.
Anyway, see that little pink spot, the one inbetween the grain of rice and the corn kernel. Yet the one that looks like a pin head, well guess what, I needleturned that! Me yes Me! Yeahhhh. It is unbeleiveable what You can do! and thats only my very first attempt!
Here have a closer look!
Here have an even closer look! See why I'm raving about the Thimblelady!
You really have to check her out! She is just unbelievable! And so nice too!

Saturday, June 27, 2009

Thimblelady Applique Package Review

To say that I'm a perfectionist is a bit of an understatement. So I have been becoming increasingly frustrated at my needleturn applique attempts. I have really fallen in love with quilting because there is so many areas in which to conquer. I'm one of those who likes to just jump in and give it a go, if it doesn't work the first time, it eats away at me until I feel I have achieved my level of said perfection, then I'm over it and want to move on to the next challenge.


So needleturn has become a bit of a love, hate challenge. Imagine my surprise when I went from this: (which a week ago I was quite happy with..)


to this:
Check out those points!


In 1 day! That's right! One - uno - un - ein - eins day!


Just to be clear I have not been paid in any way for this review, this is simply my experience.


I first saw the thimblelady on Simply Quilts and was really impressed, firstly because she was a really great hand quilter and second because she's an Aussie!

Because Liuxin is an Aussie, I felt an instant connection to her, I then started reading more information on her and felt we were kindred spirits of a kind. The way Liuxin thinks and teaches is a really logical style. Exactly the way my brain works.

While watching the Dvd which came with the kit I found myself saying 'why didn't I think of that' so many times. I then showed the DVD to my mother (my Quilting buddy among many other things) and picked up just as much the second time as I did the first!


I read a comment recently on the Thimblelady Forum which basically said 'Why bother putting out another Applique book, there's hundreds of them (books), theres nothing else to learn, applique is easy.' Well I beg to differ; I have tried all the different ways and never had the INSTANT success that I've enjoyed with 'Perfect Hand Applique'.
That butterfly is only my second attempt at Liuxin's technique.


I felt like I had learnt more in 30 minutes than I have in 12 months.


I find myself torn, I want to give a true review about this system, but I also don't want to give too much away. The Thimblelady deserves to be paid, and paid well, for her innovation! As the invention of the rotary cutter changed quilting forever, this technique will go down as a moment which changed applique. This may sound like an commercial, but I truely can't express how huge this is for my quilting life!


Ok so the system draws together the importance of all your tools from fabric, to needles and threads, even the scissors you choose to use play an important role in your success. I jumped straight in after watching the Dvd, I truly couldn't wait another moment to try Liuxin's 'tricks' and imediately picked up about 4 things I had been doing wrong. My first thought was gee the thread makes a big difference, then, wow the needle is an improvement, then, I looove this fabric it makes it so easy, then, ohh I wish I had the magic needle marker 12 months ago. I can't decide which tool made the biggest difference.

The old saying 'A poor tradesman blames his tools' came to mind, but with the right tools, one can do anything!

With the kit I ordered from the thimblelady website I not only received the Book and Dvd but it also came with everything you need to get started. A beautiful Fat quarter of stunning fabric, a reel of silk thread, a packet of needles, you also get a thimble glove, a sheet of template plastic and a pair of scissors. For $68 I learnt more than with all my magazine subscriptions ever.

The magic needle marker is incredible. I gives you a clean line to follow with nothing to wash off and I feel it actually helps with the turning under of the fabric, because it sort of 'folds' the fabric for you. There is a video of this being used on the website. At $15 a very worthy investment!

The only negative I can find is that the video is a little ameteur, but in saying that it is so engrossing you don't mind the occasional shake of the camera. Someone should be throwing money at Liuxin to make the Ultimate Hand Quilting and Applique Video.

In closing if you want to see a circle the size of the @ symbol on your keyboard needleturned, then this package is worth the money. If you want to be able to do it yourself then its worth double what your asked to pay!

Thimblelady website


If you have anything to add please do!


Paula x

Wednesday, June 17, 2009

Daisy Chain by Amy Butler

I love love love this combination of Fabrics from Amy Butlers Daisy Chain range! I guess thats why I just bought it off Etsy. Amazing value, I ended up paying about $10 AUD per yard including delivery.... I can see it becoming one of these.... Yes I'm fnally making a quilt for MY bed.

Monday, June 15, 2009

Amy Butler Addict!

My name is Paula and I'm an Amy Butler addict! hehe

Seriously I love every single thing that I have ever seen from Amy (I like to think we are on a first name basis *BG*.)

As you may know I'm going into hospital so the doctors can hopefully fix my knee this time and so I decided rather than borrowing my hubbys footy bag again, I needed my own pretty case. So I got on line and bought Amy's Weekender Bag pattern (from Belsize square 'Awesome service') and came up with this....
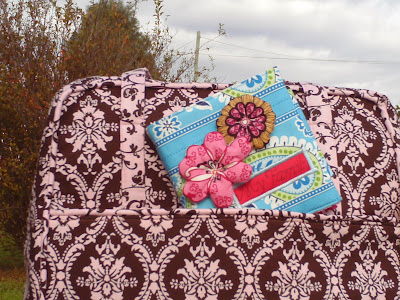
Because the recovery will be quite yucky and we have to travel to Sydney (5 hour drive) Our girls will be visiting Poppa for a few weeks, So I needed a nice photo album to take with me. Once again, Amy to the rescue and I made this awesome photo book from her 'Amy Butler's little stitches for little ones' book.
I had some gorgeous Vera Bradley fabric that was just perfect! and It only took about 1 hour (sooo frustrating!) to get the Matilda's own ink jet printable fabric through the printer. But I got the whole thing done in a day, so I was really happy with it. What do you think?

Amy's understanding of interfacing is just incredible, and very inspiring. Although the timetex was a nightmare to use in the Weekender, the finish is just incredible. The book uses 2 different types of interfacing (fused together)and again the finish is just stunning! The pages are nice and stiff, not all floppy like a normal fabric book. I can stand it up and so I'll be able to look at my pics like its a picture frame.

Next job, My matching toiletry bag. This one I'll design myself though.... Stay tuned!

Sunday, June 14, 2009

Static

An online quilting group I belong to has been discussing static and how treads stick to our fingers as we sew, and it brought this picture of Cherub #2 to mind. The more she went down the slid, the more her hair stood on end! hehe :)

Anyway, I have been doing heaps of sewing and not much blogging.... I guess thats why I have been getting lots of sewing done :) Catch 22.


Anyway I have finished my Amy Butler Weekender Bag to take to hospital, I have made a new table runner, and finished 3 UFO's. Cool huh! I've also nearly finished a little Photo book, (also to take to hospital) It's from Amy Butlers Little ones book and its just adorable!! I will try to take some pictures later today.

Thursday, June 4, 2009

Needle turn Applique

I have had a crazy week. I managed to get in a bit of designing and stitching between the hundreds of tissues that we have gone through with 3 sick kids.

My Etsy shop kicked off well with lots of visitors and a few sales too. Woo hoo.

I even got a message from Homespun magazine asking if I'd be interested in designing a project for them. I was totally chuffed!

My husband spent the night last night close to tears as his beloved blues where hammered by QLD in the state of origin. That first silly decition lost it for us, totally destroying our mojo. :)

On a stitching note, I have been trying out a new applique technique, here's the tutorial I used. All I can say is wow! I have tried needleturn so may times and always pulled it undone and ended up going with blanket stitch. But this method is sooo easy and much quicker than cutting out freezer paper and templates. My stitches aren't perfect yet, but much better than I've managed before, so I'm pretty happy with this.

Monday, June 1, 2009

Giveaway Day Winners!

Congratulations we have two winners! I used the random number generator on Random.org and the two numbers I got were number 34 and number 6. So congrats to Jbear and Ariel. I'll be emailing you shortly!
Thanks so much to everyone who visited, I hope you come back soon. Paula x

Sunday, May 31, 2009

My Newest Creation! Pussy-cat Pussy-cat.

Here's my newest embroidery design. I have made it into a little pillow this time. But this little pillow holds a secret! It has a secret pocket! Perfect for a little tooth, or a treasure that your little miss wants to hide away in its own little hidy hole.

I'd love some advice, do you think people would be more interested in buying just the embroidery design or the whole patterns? Or should I offer them already made or in a kit?

I have just a few things to adjust on my secret pocket cushion pattern and it will be in my etsy shop, I'd love to know what you think.

Saturday, May 30, 2009

Extra Giveaway!!

Ok I'm totally blown away by the amount of visitors and comments, so i'll definately giveaway a PDF copy of the wallhanging or the Teacup Carrier (winners choice). I'd love you to click on the follow button (I feel like I'm talking to myself alot :)) and then just say hi in the original competition post, not this one. Make sure I can contact you too. Have a great weekend and thanks for visiting! Come back soon!
Paula x

Tuesday, May 26, 2009

Owl Wallhanging, Giveaway Day (week) is here!

Ok so It is finally here! You're chance to win the very first Sew Little Fabric Wallhanging!!!
Designed by myself and beautifully stitched out by Lesley (my mum and co-creator of SLF) this is the very first design we are offering for sale. We will be selling the pattern as a PDF on etsy, complete with the easy to follow instructions of how to complete this cute little wallhanging, the embroidery design and colour chart. Measuring around 7 1/2 x 8 1/2 inches, it looks so cute hanging from a branch. It is also a great candidate for Redwork or Blackwork and we are also working on six other co-ordinating designs, each with it's own project, that will be able to be combined into a gorgeous lap or cot quilt.

Ok so here's how to win, simple really! All we want you to do is leave us a comment telling us about the last pattern you bought and where you got it from. Thats it! Easy Peasy!


Depending on how many comments we get, we may also offer a PDF copy of the design as an extra giveaway!


Entry's will be open until the 31st of May (Australian time)and the winner will be drawn randomly on the 1st of June. We will post internationally so enter now! Good Luck!

Click here to go to our Etsy Shop!

Monday, May 25, 2009

Sneek Peek!


Here's a sneek peek at the first Sew Little Fabric embroidered wallhanging. We will be selling the pattern for this and more patterns on Etsy, and tune in, in a few days for the Sew mama Sew Giveaway! You could win this cutie pie.

Saturday, May 23, 2009

Giveaway Day!!!

My absolute favourite blog ever is Sew Mama Sew, they are the place that I have found sooo many tutorials and patterns. If I need inspiration or a tutorial this is where I look.
Anyway they are having a giveaway day on May 27th and as we at Sew Little Fabric are about to launch our Etsy shop, we though that this would be a fabulous way to get some traffic to our new store, so we will be giving away one of our gorgeous new stitchery wallhangings. Featuring a cute little owl and saying this wallhanging will be the first pattern that we will be selling, also coming soon in the same series will be a coffee mug bag to take your mug to classes, a note book cover, needlecase, a gorgeous little pillow, and a lined purse. These will be available as a pattern or you can order a kit or a made to order product.
Come back soon for more details, and don't forget to check out Sew Mama Sew.

Saturday, May 16, 2009

Sew much time again.... (more surgery)

If you a little squemish I suggest you don't read on, I need to get this out though, so this is what is happening with my knee. In case you missed it, here is the original story.

Ok, so the problem is that I can just be walking (rather limping) along and all of a sudden my knee will just pop out to the side. The doctors call it an unstable knee. I call it a pain in the neck. Basically the original reconstruction didn't take, this was due to many reasons one of which was that I was pregnant and carrying the extra weight was not very helpful. Anyway I was sent to a specialist at the start of April and he said that my knee was so bad that he couldn't help me, but refered me to the head honcho at the Royal North Shore in Sydney. The original specialist was awesome and personally contacted this surgeon and made sure he would see me in a hurry. So I had an appointment set up for the end of May. A minor miracle to be seen so quickly in the public health system. Anyway I got a phone call last Tuesday from the new surgeons receptionist who asked if I was available to see him on Thursday!!! Apparently the first Dr sent an email to get the appointment moved up.... wow did I feel special hehe.
Anyway that feeling didn't last long as two different doctors examined and photographed and video taped every movement of the examination. I had two lots of x-rays and lots of pushing and pulling and tears, then the bad bits. They told me what they were going to do.

Apparently all the ligaments, tendons, muscles etc from the side of my knee right round the back to the other side are torn and useless. They aren't doing their job and holding my knee together, so my knee actually goes backwards, so when a normal knee straightens your leg is straight, my knee goes back to a 20 to 30 degree angle. It also goes about the same to the right.
A normal knee recon is not going to do anything because my fractures have healed and there is nothing wrong with the joints, its all the tissues. So they say because all my bits are useless, they are going to have to use doner tendons, ligaments etc.... Now I have always been a very loud advocate for organ donation! When I go, anyone is welcome to any bits of my body that may help them. I always said imagine if my kids need a kidney! Anyway the thing is I never imagined that I would need anything. I don't know how I feel about it.... even as I write this I feel really uneasy. I still haven't come to grips with it, because it's not a life threatening problem, it's just a walking problem.
As I read that back it seems incredibly selfish, a quadraplegic would do anything to have my knee I'm sure, but I still feel really uneasy about it.
Anyway they also have to remove my Fibular bone and somehow (my eyes had glazed over by this stage and I didn't really take it all in) drill a hole in my bones and fit the fibular back in somewhere straightening something or other..... no idea really. The end result being after a 5 hour operation I will be fitted with a brace that will be screwed into my bones. This is what terrifys me. My kids will be petrified by the sight of it and I don't know how it will feel when they take it off, and how will I get my knickers on hehehe.....
I'll be in the brace for from 6 weeks to 3 months, basically as long as possible. This means I'm back in the wheelchair for around 3 to 6 months, depending on how it all goes. Surgery is set for July.
All because of a bloody spilt bit of cordial.... beware of wet tiles people!!!!!
Anyway don't feel sorry for me, their are people worse off than me!! I just needed to get this out there, anyone with any experience in this I'd love to hear from you....

Thanks for listening...
Paula x

Tuesday, May 5, 2009

Birthday Party Nightmare!

Well what a weekend! Thank God its over!!!
Chloe's 3rd birthday party was held on Sunday afternoon and everything was going amazingly well, (too well) we had everything organised, all the games were ready, the house was as clean as it was going to get. Then me being me I had to have a disaster! Being the drama queen I am (totally unintentionally mined you) I had to once again go down in a screaming heap.
All the Aussies might remember that tv add, the little boy saying "his legs went this way and his head went that way". Well that was me
My darling husband had moped the bathroom floor and as I was walking out my leg went this way, my bad knee slamed into the bathroom door, my shoulder into the wall and my head ended up on the bathroom floor. hahaha what a sight I must have been as my mum and sister ran in to see what I had done. My body being spread over 3 different rooms. Anyway with a lot of help from my family, the kids had a great day! We had too much food left over and the kids were still on a sugar high the next day, but fun was had by all. Even if 3/4 of my body is now black and blue :)

I'm quite proud of the cake, what do you think?


Friday, May 1, 2009

Owl Tutorials and Patterns

A Lady who lost everything in the Victorian bushfires had a beloved collection of Owls that she unfortunately lost. So an online group that I belong to (Scquilters) has decided to try and repopulate her Parliment. As you can imagine with all I have going on at the moment I have no time to make some myself, but what I can do is put together a list a sites that have some free tutorials and patterns, so those that do have a few free minutes can maybe whip up a few.

I've added my own tutorial here
These are really easy tutorials:
olly_the_owl
plush_owl
how-to-owl-softie
Abraham Owl
Owl Plushie

Video Tutorial:
Owl Softie

Rediculously cute!
owl-egg-cosy-tutorial

These have some great inspiration:
owls
owl,softie

I'll add more as I find them so check back often...
Paula x

Thursday, April 30, 2009

Ladybugs are taking over!

Nan and I spent the day today making ladybugs for Chloes birthday. They are made with felt and have a little rice inside to weight them, We will be using them to play an old favourite, the ladybug toss. The kids will be trying to land their own ladybugs on some felt leaves. Very cute...
The big ladybug is sad because she's lost her spots, but if the kids can find a balloon to pop they might just find her spots... I wonder if they can have a spin and get them in the right spots even with a red and black spotty blindfold on?
The felt leaves will also come in handy for musical dancing ladybugs (musical chairs) and those nasty chalk spiders that are all over the front of the house will hopefully be washed out with waterbombs. As well as a little ladybug craft project and a red and black pass the parcel and a pinata to top it off, what a busy day we are in for!!!

Friday, April 24, 2009

Australian Patchwork and Quilting 15th B'day Comp

I have some very exciting news! my darling husband went out the other day and spent the bonus he got from Mr Rudd on a brand new Janome Quilting Machine for me for mothers day. So exciting!! It sews like a dream!!! My old Husqvarna Orchidea had a loose band so it was getting a bit noisy, I also tried to fix it after I sewed through my finger and threw the timing out, but thats another story. Anyway I desperately needed a new machine and was hoping to win the AP&Q 15th Birthday cover quilt competition so that I had a new Brother Innovis, but I don't need to win so badly now... :)
Here's my new princess...........
And a little teaser for you, this is a part of my competition quilt. Hopefully you'll have to buy the magazine to see the finished product. *Big Grin* There is a big story behind my quilt, but you'll have to wait to hear that too, sorry. :)


Monday, April 20, 2009

The Naughty Spot

This was my first attempt at free motion quilting, its terribly uneven. I used a high loft batting and will not be doing that again. But the naughty spot serves its purpose :)

Sunday, April 19, 2009

Quilt Sizes

I'm constantly trying to work out how big to make quilts so I have done a bit of research and decided to make up a little chart in Aussie terms, this is just my guide, not a rule! I looked at many different sites and used an average of the mattress size plus a drop of 15" and an extra 7.5" added to each end. If you would like a pillow tuck I found that adding about 10" to the length was the average. I rounded the cm's to the nearest 5cm, just because I hate weird numbers. J I thought this might help others too. So here it is....

Mattress Sizes

Bed Size

Metric

Imperial

Cot

71 x 132

28 x 52"

Single

92 x 188

36 x 74"

King Single

107 x 203

42 x 80"

Double

137 x 188

54 x 74"

Queen

153 x 203

60 x 80"

King

183 x 203

72 x 80"


Quilt Sizes

Bed Size

Metric

Imperial

Cot

90 x 150

34 x 58"

Single

170 x 225

66 x 89"

King Single

185 x 240

72 x 95"

Double

215 x 225

84 x 89"

Queen

230 x 240

90 x 95"

King

260 x 240

102 x 95"

Nan's 60th Birthday Quilt

It's my mums 60th on the 22nd and about a month or two ago, my sister Jo suggested that we should all do a project for Mum, the problem is that I am the only stitcher in the family. My sisters though are all very quick learners and perfectionists so we finally got it done (the binding was finished the day after we gave it t her :) but mums are usually just a quilt top when she hands them over, so not finishing it was quite appropriate. sorry mum :)

I designed this with the plan that we would each do 3 hearts each. 1 blanket stitch applique, 1 reverse applique and 1 embroidered. The coloured squares were going to be plain, but we decided to put little quotes (modified to make them about our mum) on them. As I was running out of time to finish them, my eldest sister Tracey ended up embroidering 1o of the 12! Not bad for a non sewer. The back is all Nan's grandkids hands (60 fingers, very appropriate), I was going to put them in a circle with fingers touching, but couldn't work out how I would quilt it, so after a suggestion from a fellow scquilter I put them on the border. The border became very large as we had to fit sean's hands (Traceys son) on it. He's nearly 15 and is extremely tall. (A basketballer with very big hands) But it worked out perfectly because you can see the quilted shape of all the hands on the front.

This is Tracey's embridered heart. I think we may have converted her, I think she secretly really enjoyed doing it.

This is 5 of the 6 grandkids, Molly and Chloe are at the back and Jo's kids Reilly and Leah at the front.
I decided to make it a quilt as you go quilt in the end, because Nic and Jo hadn't finished their embroidered hearts and I was stressing about getting it all finished in time, and after reading all the fellow scquilters qayg storys I thought it was worth a try. It worked out perfectly and I gained an enrmous amount of confidence with free motion quilting. It was so easy not having to hold a big quilt in the machine, just a 6 1/2 inch square. My only suggestion though is don't do this if you don't like binding!!!!
Here's my angel with his little hands... too cute!

THE last stitch!

I got some of the Matilda's own Ink Jet printable fabric to do the label. It turned out beautifully, but because the backing of it is plastic I had no end of trouble getting my printer to pull it through, but I eventually got it and it looks amazing!!!! I think so anyway, what do you think?

This is the very first Quilt that mum has been given, she is normally the giver, not receiver.

Happy Birthday Nan! I love you!!!

Tuesday, April 14, 2009

Easter Tops

It's been a crazy Easter! I hope everyone was safe and happy. We took the kids to Ulladulla for the Easter parade on Easter Sunday and it was fantastic! Some very creative floats and the girls in their Easter Shirts looked just gorgeous. I had bought some easter chick and egg fabric from Ebay months ago to make some little Baskets, but of course everything else was more important and seeing as the girls woke up at 6am I had plenty of time (wink, wink) before we had to leave at 9.30am. So a little bit of cutting and a few quick seams, a bit of shirring and we were done! We decided that by adding a frill on the bottom each year we could count the years that they can wear them hehehe.


Once again sorry about the pic, DH took this while I was having the quickest shower in history and didn't know that the picture is actually taken a fraction of a second after the click sound, so unless you hold the camera super steady for a few seconds, it blurs like this. Anyway.... Check out the little chicks in their hair. Almost every float on the parade stopped and gave the girls a treat, they just looked so cute!


Apart from that Easter has been all about sewing for me, I have of course taken on way to many projects and was starting to stress about getting it all done, I have a project I'm doing for my mums 60th, but I can't talk about that yet just in case she finds her way here. That one needs to be finished in the next few weeks, Then I have a quilt planned for my Daughters 3rd birthday on the 5th of May (not even started, but I have all the fabric). I'm also doing a quilt for the Australian Patchwork and Quilting Magazines 15th Birthday competition. The prize is a gorgeous Brother innovis sewing machine, which I desperately need after I tried to 'fix' my Husqvarna Orchidea and instead I totally trashed it! hehe oops. Time to take it to a professional I think. Anyway I've almost finished Jacks sensory quilt, I've finished the quilting and am just stitching the last 2 sides of the binding, so pics tommorow I hope.

Thursday, April 9, 2009

Rainbows

Your rainbow is intensely shaded gray, brown, and blue.


What is says about you: You are an elegant person. You appreciate the roughness of nature. You feel closer to people when you understand their imperfections. You share hobbies with friends and like trying to fit into their routines.

Find the colors of your rainbow at spacefem.com.

A bit of sillyness, but remarkably accurate!

Easter bunny grass Update

OK so lesson learnt - this didn't work. As my thumbs are decidedly brown, I don't know why I thought this would work, but the kids had fun trying... :) (Molly still goes to check her grass daily)

Maybe if we had filled the lids with soil? Anyway it was impossible to keep the seeds moist so I guess that was the problem, but as mentioned I'm nooooo gardener, so I have no idea. Hopefully the easter bunny will find some other spot to leave his loot.

Happy Easter all! Stay off the roads and be safe.
Luv the Storm Family.

Banksia Mice

I'm sorry about the quality of the pic, but as previously mentioned my camera is crappy. Anyway my sister and I took the kids (the 5 little cousins) to the park last weekend and there were little mice running around everywhere! At least there was when we were finished. We saw lots of banksia type pineconey things and broke off leaves that had fallen off with a big branch. The tips of the leaves became little ears and whole leaves became tails. Then the little buggers went squeeking around everywhere! Who knew mice could tickle people. :)
Now I just have to get all the mice we collected out of my car.

PS There is Jack and I in the background.


Our little Daredevils

Sunday, April 5, 2009

Jack's Sensory Quilt

As promised on SCQuilters, here is a few pics of the quilt I'm yet to finish. Just a bit more quilting and then the binding.


The Teddy bear is fusible appliqued on, using teddy bear fur that a friend gave me. She used to make teddy's but life got in the way. I then again fusible appliqued the patches on his hands and face. I Loooove fusible applique, it feature in one way or another in all my quilts.


This was my first design I did using EQ5.


I thought he would enjoy touching the fur and feeling the different texture during tummy time.

Friday, April 3, 2009

Easter bunny grass

Ok so this is going to be picture heavy I'm sorry, but I finally worked out how to get a non blurry photo from my cheap as chips camera. I really need a new one.
Anyway, I saw Martha doing a similar thing and though this would be a fantastic tradition to start with the kids. A little patch of grass for the easter bunny to leave an egg or two on.
The problem was I didn't check the website for details and didn't hear that she used wheat grass seed not grass seed. Oh well hopefully it will still work.

So we grabbed together the neccessary items...


Two lids from old shoe boxes, 3 large plastic bags (see through is best), paper towel, a spray bottle, some cups and of course some seed (we used grass seed, but Martha suggests wheat grass seed)

I cut one of the bags in half so it would cover the shoe box, we didn't want soggy cardboard.

Then we layed a couple of sheets of paper towel on the plastic.

Then the fun begins, give the paper towel a good spray with the spray bottle.. (keep the camera clear! You need to be further away than you think.... those bottles can really get a good spray going! hehe)

Who doesn't love spraying?
Then we spread out a nice layer of grass seed on the wet paper towel.


You will have seed everywhere, next time I will do this outside! :)We put our lids into their little green house (the other plastic bag) and.....

Found a sunny spot to watch and wait...........

We will keep spraying every once in a while so they don't dry out....

gee I hope this works!!!