I have Microsoft program Digital Image Pro, but most photo editing software will do the same things, you’ll just have to mess around with your own program to see what gives you the same effects.
So we start with our photo....
So we start with our photo....
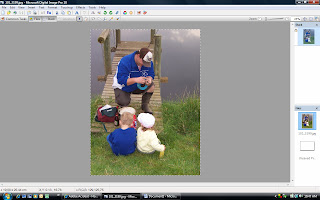
I just loved this picture of my husband and daughter, the little boy was just hanging around watching, I didn’t want him in my wall hanging so I will just take him out later.
The most important thing is to make sure your picture has nice defined lines and contrasts; a soft picture in the snow is probably not going to work.
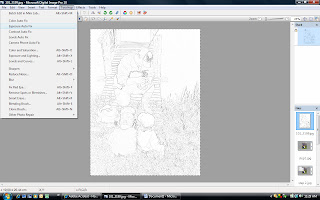
Ok so we’ve picked our picture, now to start editing it. Our first step is to go into the effects section and go to all filters, on other software this is usually where you change your picture to Black and White or get rid of red eye, stuff like that.
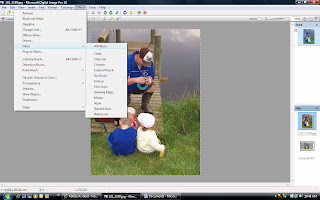
You want to go to the Arts and Crafts section and click on Photocopy. This will turn your picture to an outline drawing look.
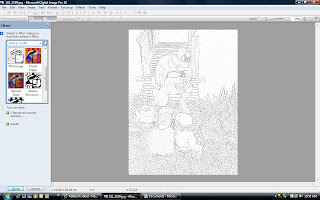
Next click on the change advanced options tab and lower the detail option until you get rid of some of the noise, giving you a nice clean outline to trace.
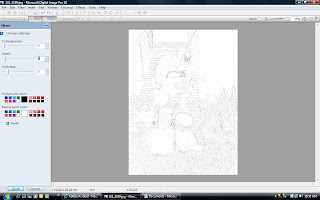
The only problem left is that the lines are fairly light and I need the lines to be a bit darker so I can actually see them.
So click on Touch up and then on Exposure Auto Fix.
That’s it! You did it, now print out your picture the finished size you want it to be and your computer work is done!
Now on to the fun stuff!
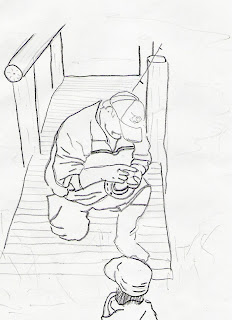
I usually take my print out and stick it up on the window, (you could use a light box if you have one) and start tracing the bits that I want for my finished project, in my case I took out the little boy, beer bottle and bag and most of the grass. This is where your individual style and creativity comes into it. You could edit 2 or 3 different pictures and paste the best bits of each into your final pattern.
This is what I ended up with for my final pattern.
This is what I ended up with for my final pattern.
I also did a Google search for some nice phrases or poems about family and printed out my poem in the font I liked and traced it in the same way.
Next just trace onto your fabric in the usual way and embroider as you wish.
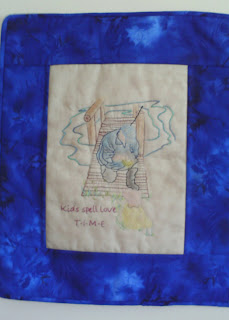
Congratulations you are done!
This is my very first Tutorial so let me know what you think?
Congratulations - creative, inspiring and clear
ReplyDeletedefinately something to add to my visual diary for the future.
also loved that photo of your kids - what delightful smiles of happiness
A great tutorial. Clear and easy to follow. Now I will have to run off and have a play. Thank yu for that.
ReplyDeleteLiz
thank you ladies, you have inspired me to have another go at another tutorial. Now what should that be? hmmm... no idea. hehe
ReplyDeletewhat a great idea. New projects for fun--thanks for helping us find some very personal things to embroider. I have some fun spring sketches if you are in a stitching mood.
ReplyDelete